Enable the Mac Firewall in OS X Mountain Lion
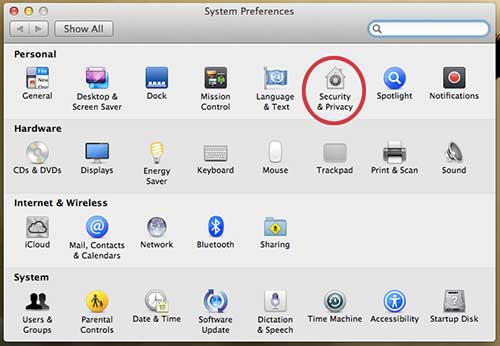
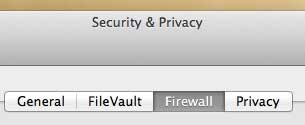
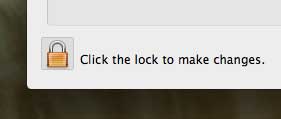
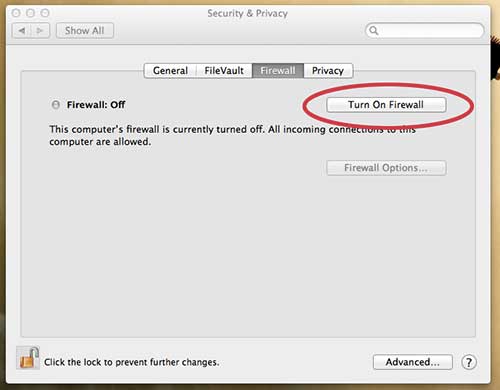
Turning on the firewall is meant as a means to keep other computers and devices from accessing the services that are running on your computer. Since you do not know all of the machines that are connected to a public network, it is difficult to know if they are all safe. This is the reason why you should enable your firewall when you are using a public network. If you are unsure whether a network is public, then you should err on the side of caution and enable the firewall at that point. Step 1: Click the System Preferences icon in the dock at the bottom of your screen. Step 2: Click the Security & Privacy icon in the Personal section at the top of the window. Step 3: Click the Firewall tab at the top of the window. Step 4: Click the lock icon at the bottom-left corner of the window. Step 5: Type the password for your user account. Step 6: Click the Turn on Firewall button at the right side of the window. Step 7: Click the lock icon at the bottom-left corner of the window again to prevent any additional changes. Have you found that there are certain situations where you wish your MacBook Air had a feature that it does not? Read about some of our favorite MacBook Air accessories to learn about some affordable cables and components that can improve your experience with the laptop. After receiving his Bachelor’s and Master’s degrees in Computer Science he spent several years working in IT management for small businesses. However, he now works full time writing content online and creating websites. His main writing topics include iPhones, Microsoft Office, Google Apps, Android, and Photoshop, but he has also written about many other tech topics as well. Read his full bio here.
You may opt out at any time. Read our Privacy Policy
