One way that you can make it a little more difficult for them to find your recent documents is to hide all of them. Removing the list of recent documents in Excel 2013 creates a barrier to finding your recent workbooks, ensuring that anyone who simply opens Excel on your computer won’t be able to immediately find what you have been working on.
How to Hide the List of Recent Documents in Excel 2013
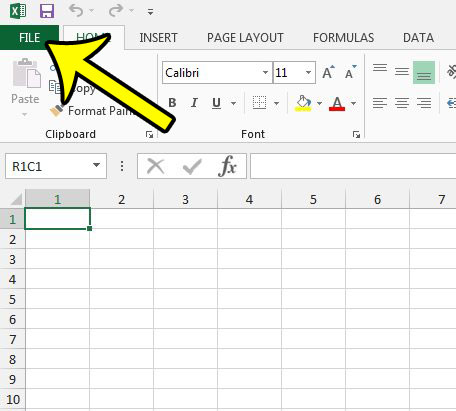
The steps below are going to hide the list of documents that is visible when you click the Open option in the column at the left side of the Excel 2013 File menu. Note that this is not going to hide those files on your computer. People with access to your computer will still be able to find the files by browsing to their actual location. Following the steps below will simply require them to find those files manually instead of clicking a link in Excel. Step 1: Open Excel 2013. Step 2: Click the File tab at the top-left corner of the window.
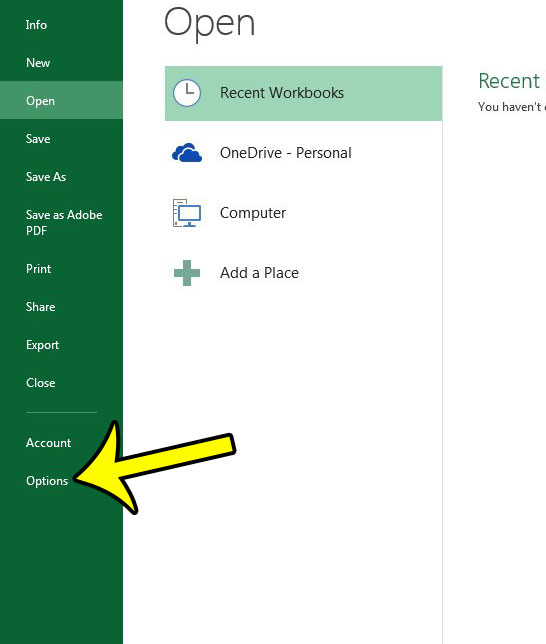
Step 3: Click Options near the bottom of the column on the left side of the window.
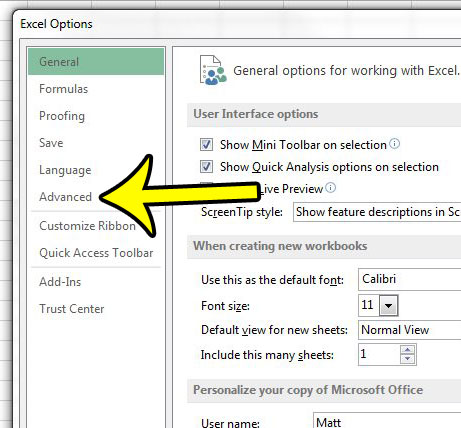
Step 3: Click the Advanced tab at the left side of the Excel Options window.
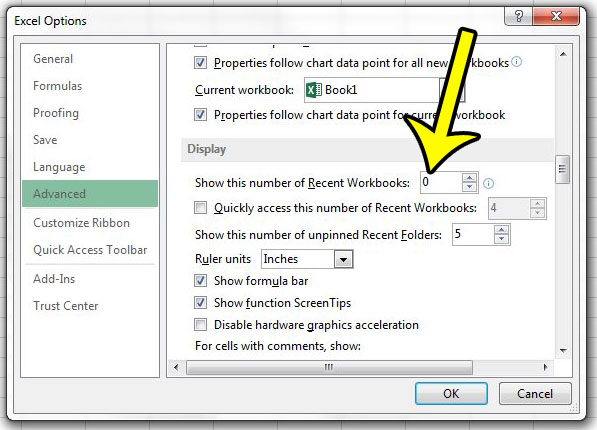
Step 4: Scroll down to the Display section of the menu, then enter 0 into the field to the right of Show this number of Recent Workbooks.
Step 5: You can then click the OK button at the bottom of the window to save your changes. Now when you click File, then Open, you should not see any Excel files listed. Do you need to list UPC numbers in an Excel file, but they don’t display properly? Read our guide on formatting UPCs in Excel and see the options that are available to you which will allow those numbers to display as you need them. He specializes in writing content about iPhones, Android devices, Microsoft Office, and many other popular applications and devices. Read his full bio here.


