The most effective method of securing the data in your Excel workbook is to simply password protect the entire file. This will ensure that anyone who comes into possession of the file will need to correctly enter a password before they can view or edit of the information contained within any of the worksheets.
Require a Password to Open an Excel 2013 Document
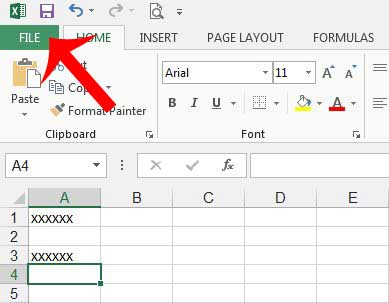
The steps below will teach you how to completely password protect a document in Microsoft Excel 2013. Anyone that wants to open the file will need to know the password in order to view it. Step 1: Open the Excel file that you want to password protect. Step 2: Click the green File tab at the top-left corner of the window.
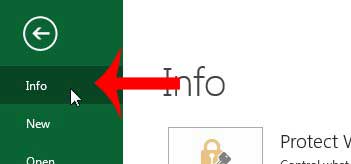
Step 3: Click the Info option at the top-left of the column on the left side of the screen.
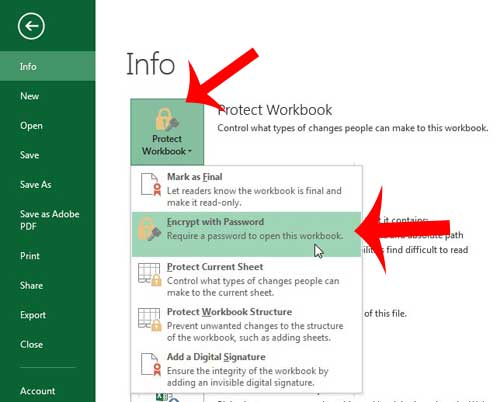
Step 4: Click the Protect Workbook button, then click the Encrypt with Password option.
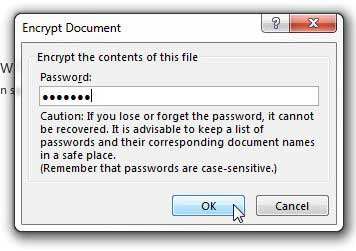
Step 5: Type the password into the field at the center of the window, then click the OK button.
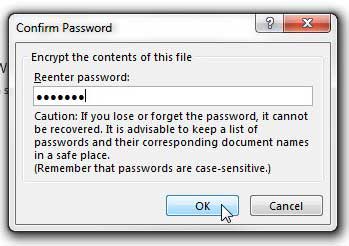
Step 6: Re-type the password into the center field, then click the OK button again to confirm the password.
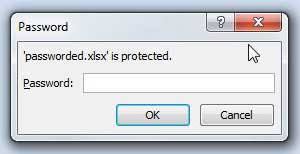
Make sure to save the spreadsheet after changing this setting. The next time you attempt to open your Excel file, you will be presented with a password prompt that you will need to complete before you can begin viewing or editing your file.
Do you have an Excel file that is difficult to work with because it contains a lot of formatting? This article will teach you how to remove cell formatting in Excel 2013. After receiving his Bachelor’s and Master’s degrees in Computer Science he spent several years working in IT management for small businesses. However, he now works full time writing content online and creating websites. His main writing topics include iPhones, Microsoft Office, Google Apps, Android, and Photoshop, but he has also written about many other tech topics as well. Read his full bio here.
You may opt out at any time. Read our Privacy Policy
