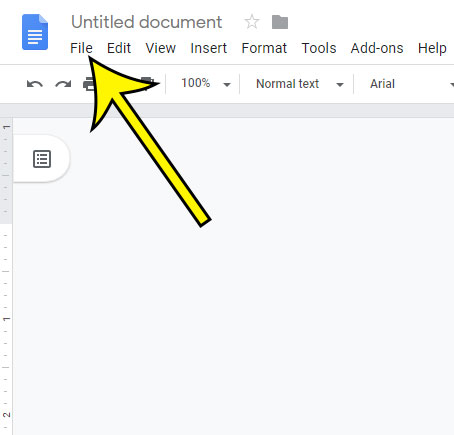
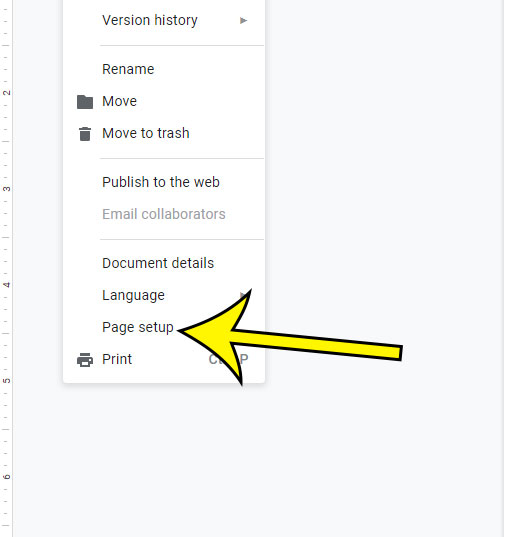
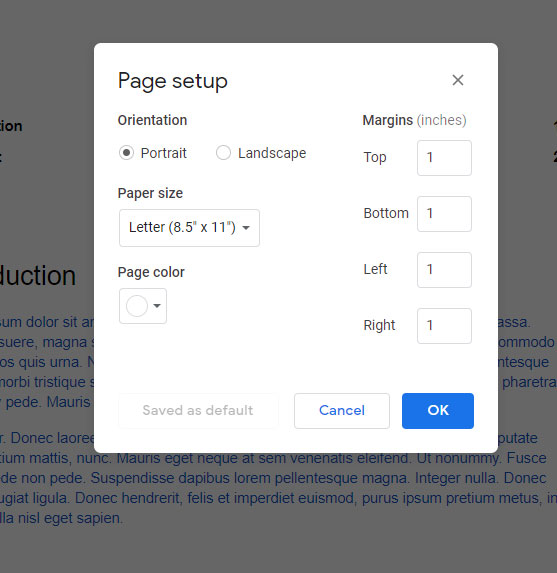
These could include things like page numbers and fonts, but they might also include specific sizing for your page margins. The steps in this article are going to show you how to change margins in Google Docs from the Page Setup menu. We will go over the steps briefly at the start of the article, then we will continue with additional information and pictures for each of the steps.
How to Use the Google Docs One Inch Margin Setting
Our guide continues below with additional information on the 1 inch margin Google Docs option, including pictures of these steps. Word processing applications like Microsoft Word and Google Docs provide you with many ways to format your document. Whether you need to use a specific font or a particular type of indent, there is probably a setting that you can change to make that adjustment. One setting that you may need to apply is a 1 inch margin. This is a common requirement for many institutions, as a common margin size can make it easier for a teacher or supervisor to write notes, while also ensuring that page length requirements aren’t being manipulated. Did you forget to include a section in a document? Find out how to add a new page on Google Docs while doing only a minimal amount of editing.
How to Set 1 Inch Top, Bottom, Left and Right Margins in Google Docs
The steps in this article were performed in the desktop version of the Google Chrome Web browser, but will also work in other desktop browsers like Mozilla Firefox or Microsoft Edge. You may notice that there is a Set as default button at the bottom-left of this menu. If you would like your default margins to be 1 inch for all future documents that you create in Google Docs, then you may want to click that button to apply the setting. The margins of your document are the white space around the edge of the page. This includes the area at the top of the page, which is also known as the header. If you have information in that location, such as a page number, then its location may be affected if you adjust the size of your document margins.
Another Way to Make 1 Inch Margins in Google Docs
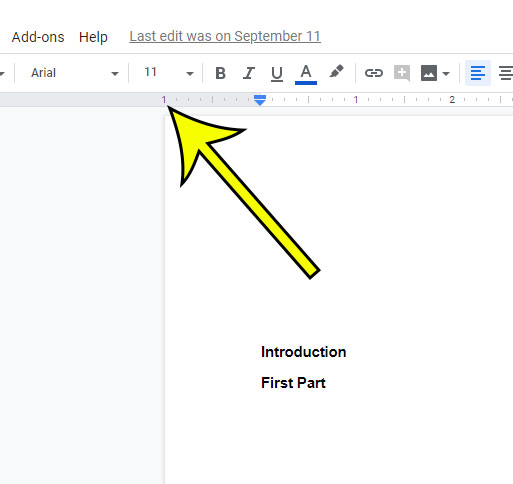
There is another method that you can use to adjust the page margins for your document. Simply place your mouse cursor at the left, right, top or bottom of the rulers on the edges of the document until the cursor changes to a line with an arrow on each end, then click and drag to adjust the margin size. I have placed my cursor in the correct location to adjust the left margin in the image below. Depending on your document editing preferences, this may be more comfortable method of setting one inch margins. Find out how to do a grammar check in Google Docs if you want to make sure that you aren’t making any serious errors in your document content. You will need to open your document in the Docs app, then tap the three dots at the upper right corner of the screen. There you can select Page setup, which you can open and choose the Margins option there. You can then choose from the Google Docs margins options listed there, which include: – Narrow – this uses half inch margins for the entire document– Default – this uses 1 inch margins for the entire document– Wide – this uses 1 inch margins on the top and bottom, but 2 inch margins on the left and right– Custom – you can choose your own column sizes here Note that adjusting margins, especially all four margins, can cause the same document to increase its printed page count. After setting new margins it’s always a good idea to do a quick check over the document to ensure that you haven’t affected any page elements, or made the document page count too high or too low. the left side and the right side of the page will still be affected by the margin options on the Page setup menu, as those affect the entire page regardless of the number of columns.
He specializes in writing content about iPhones, Android devices, Microsoft Office, and many other popular applications and devices. Read his full bio here.


