There are several ways to combat large file sizes in Powerpoint, but the focus of this article will be on the editing data that is stored within pictures that you have resized and edited within Powerpoint itself. This editing data lets you restore the pictures to their previous states, but it also increases your file size. Our tutorial below will show you how to get Powerpoint to discard that editing data and reduce the size of your file.
How to Reduce Picture Size in Powerpoint 2013 by Discarding Editing Data
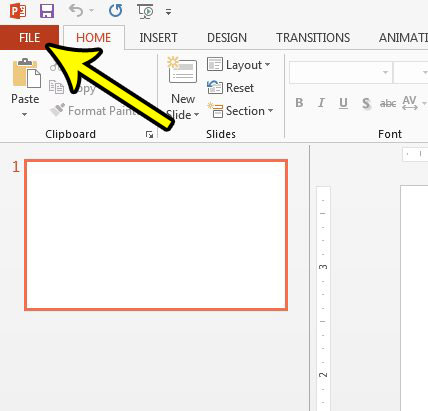
The steps in this article were performed in Microsoft Powerpoint 2013. Changing the setting in the guide below will cause Powerpoint to reduce your image size and, ultimately your presentation file size, by discarding any editing data that is associated with a picture in the file. Note that discarding this data will prevent you from restoring the picture to its original state in the file after you have saved and closed the presentation. Step 1: Open Powerpoint 2013. Step 2: Click the File tab at the top-left corner of the window.
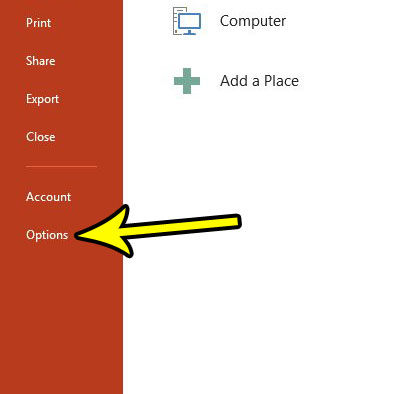
Step 3: Click the Options button at the bottom of the left column.
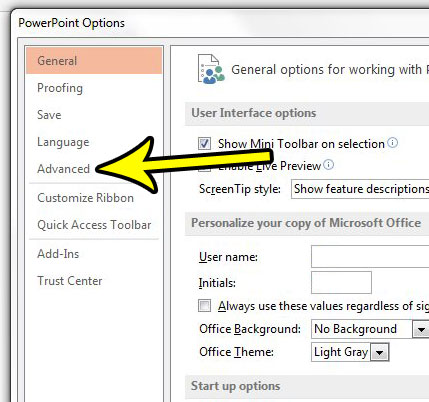
Step 4: Click the Advanced tab at the left side of the Powerpoint Options window.
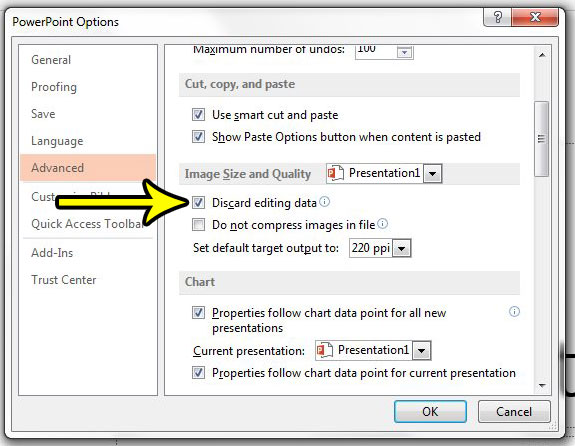
Step 5: Check the box to the left of Discard editing data, then click the OK button at the bottom of the window.
If you are trying to reduce the size of your Powerpoint file, then there are some other things you can try, too. For example, compressing your pictures can reduce the file size as well. He specializes in writing content about iPhones, Android devices, Microsoft Office, and many other popular applications and devices. Read his full bio here.


