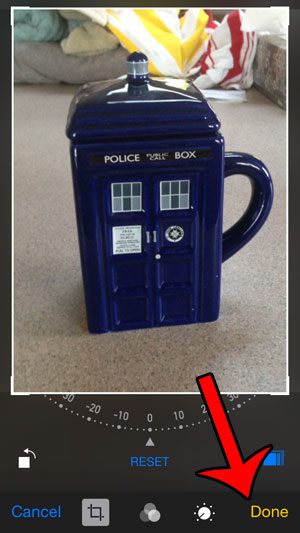
This is a helpful option when you want to have a picture printed as a 5×7 image, a square, or any of the other available ratios. So continue reading below to find out how you can edit your iPhone pictures in this manner.
Change an iPhone Picture to a Different Aspect Ratio
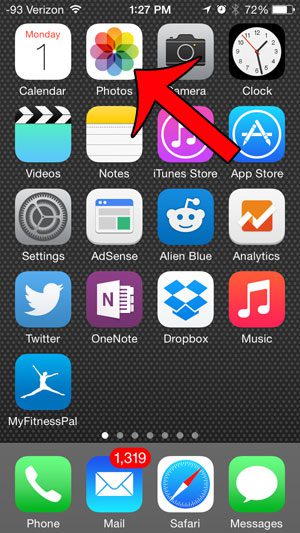
The steps in this article were performed in iOS 8, on an iPhone 5. The editing interface for pictures changes often, so they exact steps to perform this adjustment may vary slightly in earlier versions of iOS. Step 1: Open the Photos app.
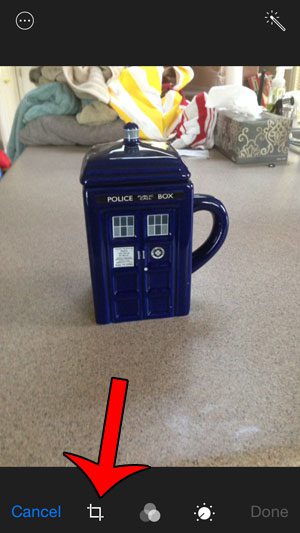
Step 2: Locate the picture that you want to edit. Step 3: Tap the Edit button at the top-right corner of the screen.
Step 4: Touch the Crop icon at the bottom of the screen.
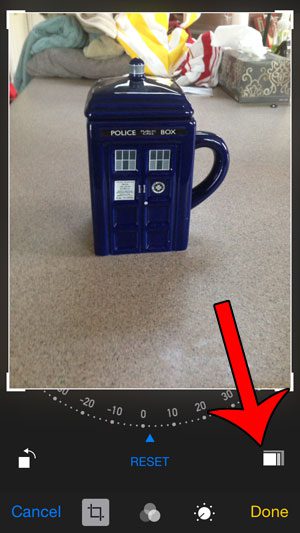
Step 5: Touch the icon at the bottom-right of the screen that looks like three stacked rectangles.
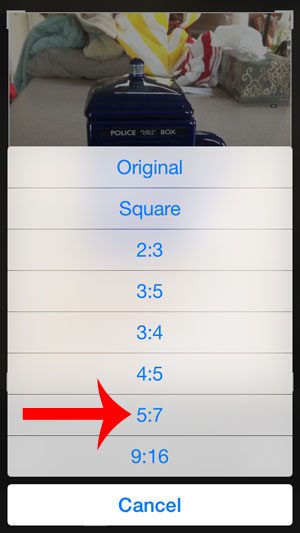
Step 6: Select the aspect ratio to which you want to crop the picture.
Step 7: Drag the picture so that it fits in the frame how you want. Note that you can also pinch the screen to zoom in and out, just be careful not to drag the white border surrounding the image, as that can change the aspect ratio again. Once you are done, tap the Done button at the bottom-right corner of the screen.
If you are looking for more information about your iPhone, you can read more of our articles here. You can visit Apple’s site to learn more about the improvements to the photos app in iOS 8. After receiving his Bachelor’s and Master’s degrees in Computer Science he spent several years working in IT management for small businesses. However, he now works full time writing content online and creating websites. His main writing topics include iPhones, Microsoft Office, Google Apps, Android, and Photoshop, but he has also written about many other tech topics as well. Read his full bio here.
You may opt out at any time. Read our Privacy Policy
