Create a Basic Form With Microsoft Forms
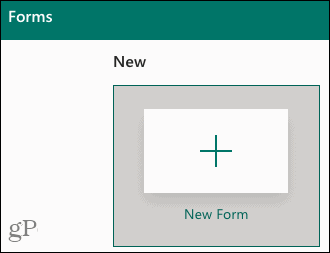
Visit the Microsoft Forms website and sign in with your Microsoft account. At the top, click New Form to get started with a basic form.
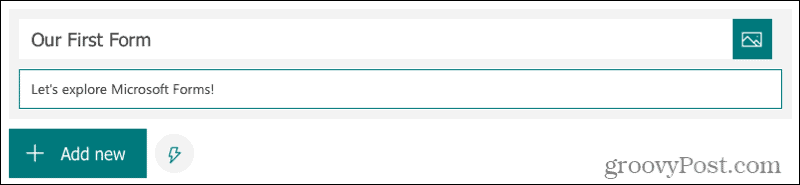
Give your new form a title and, optionally, a description. Click Add new to create your first question. You can also use the lightning bolt at any point to get question suggestions.
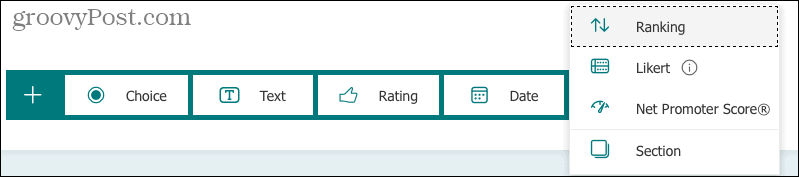
Next, select your question type. You can pick from Choice, Text, Rating, or Date. Click the arrow to the right for additional types like Ranking, Likert, or Net Promoter Score.
Example Form
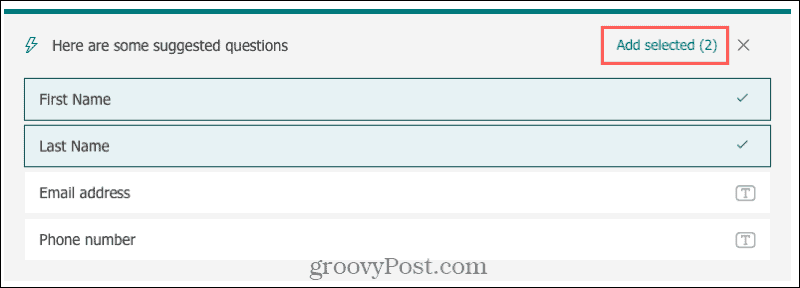
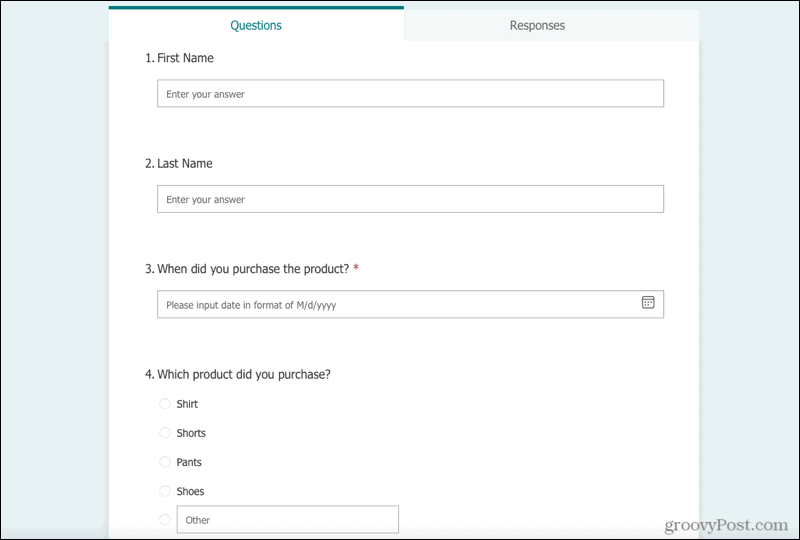
Starting simple, we’ll select one of each of the most common question types and create a sample form. First, we will pick from the suggestions and select First Name and Last Name. Then click Add selected to pop the questions into the form. These fall into the Text question type.
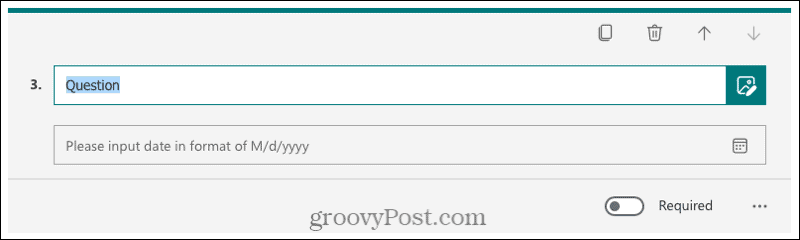
Click Add new again to add your next question and select the type. For this one, we’ll choose Date and enter the Question.
For the next one, we’ll pick a Choice question. Enter the Question and list the options. You can include an “Other” option in your list if you like.
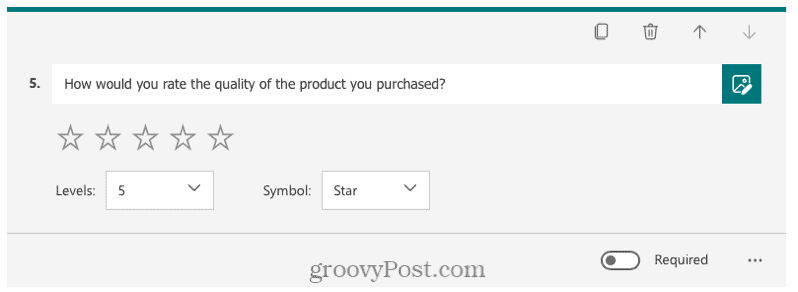
Finally, we’ll use the last most common question type for our form and pick Rating. Again, enter your Question. You can then select the Levels (2 to 10) and Symbol (Star or Number) for your rating.
And there we have it, a basic form in Microsoft Forms!
Now, of course, you have additional options for your questions and your form style. So, let’s move on!
Use Question Options
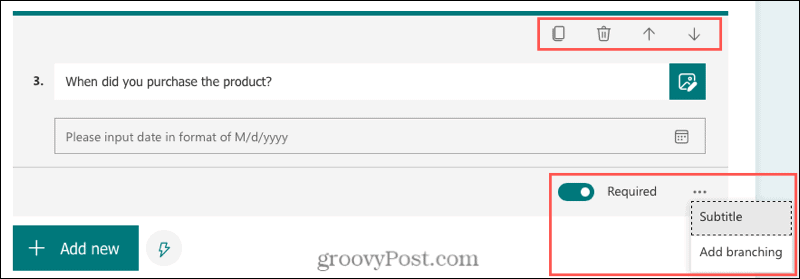
When you create a form in Microsoft Forms, each question type offers the same basics that you can apply. At the top of the question area, you can click to Copy, Delete, or Move the question up or down. At the bottom, you’ll see a toggle for Required. This places a red asterisk next to the question, and the respondent must respond to the question. On the bottom right, click the More Settings button (three dots), and you’ll see options to include a Subtitle for the question or Add Branching. (Branching lets you direct the respondent to another question or end of the form based on their answer.)
Use Question Type-Specific Options
You’ll find extra settings available that vary per question type. You can find these additional options in the More Settings menu.
Choice: You can allow multiple answers, shuffle the options, and change the format to a drop-down list.Text: You can enable long answers for respondents to fit more text and apply restrictions.Rating: You can include labels for the first and last levels.
Choose a Form Theme
If you want to add some pizzazz to your form, you can choose a different color, or background image or upload your own image. Click Theme on the top right of the form creation screen and make your selection.
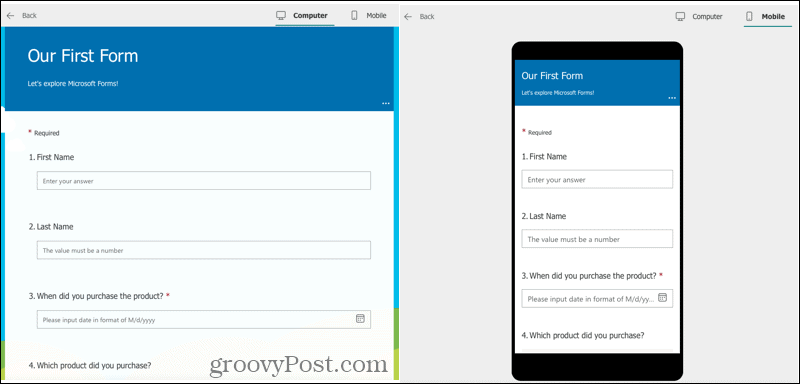
See a Preview of Your Form
Anytime throughout the creation process, you can check out a preview of your form. This allows you to see the form as your respondents will and lets you view both computer and mobile versions. Click Preview on the top right of the form creation screen. Then use the Computer and Mobile tabs to switch between views. Click the Back arrow on the top left to continue editing your form editing.
Adjust Your Form Settings
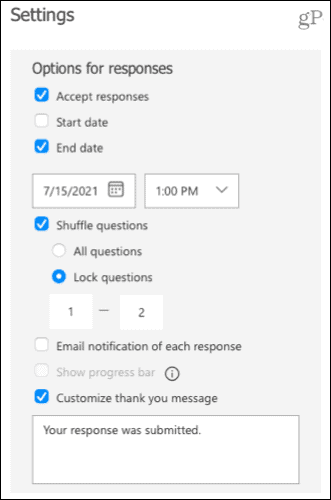
Before you finish up your form and share it with others, it’s a good idea to look at the form settings. Click More Form Settings (three dots) on the top right next to Send and choose Settings.
Be sure to check the box for Accept responses as long as you want to do so. To stop receiving responses, head back to these Settings and uncheck the box. In addition, you can enter a start and end date for your form, shuffle the questions and lock certain ones, receive email notification of each response, and customize a thank you message. Check the boxes and complete any additional details for them as you wish.
Send Your Form
When you’re happy with your form and ready to share it, click Send on the top right. You then have six handy ways to share your form.
Link: Copy a link to the form and optionally shorten the URL.QR Code: Download a QR code for your respondents to scan and access the form.Embed: Grab the code to embed the form on your website or blog.Email: Populate an email with the subject line and body to send to your respondents.Facebook: Click to create a Facebook post with a link to your form.Twitter: Click to create a tweet on Twitter with a link to your form.
You also have the option to Share as a template using the option at the bottom. If you want to standardize how your organization’s forms are set up, this is convenient for sharing the form template with your coworkers or team.
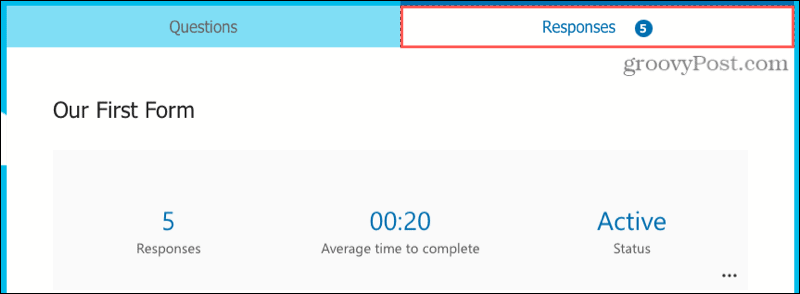
View Your Form Responses
You can view responses from your form submissions on the Responses tab. You’ll also see the number of responses you’ve received on the tab.
The way that your responses display depends on the question type. For instance, the Choice question type shows responses in a colorful pie chart while Rating questions offer an average.
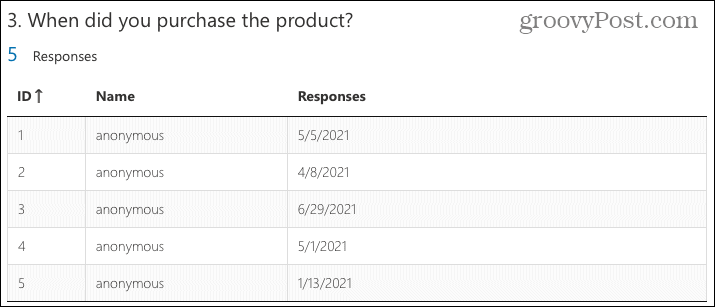
Below each question title and number, you have a link for More Details. Click to see the question responses in table form.
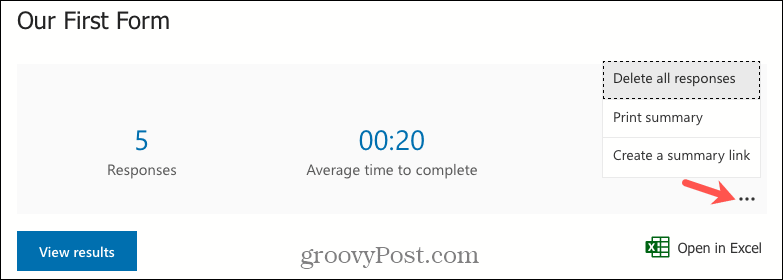
Use Form Response Actions
At the top of the Responses tab, you have a few actions for working with your responses.
View Results: See each individual form submission.Open in Excel: Download responses to Microsoft Excel on your computer.More Options for Responses (three dots): Delete all of your responses, print a summary, or create a summary link.
Create Your Next Form With Microsoft Forms
If you’re ready to try Microsoft Forms for your next signup, registration, or feedback form, you now have the basics you need to get started. And be sure to check back with groovyPost for more ways to use Microsoft Forms. Comment Name * Email *
Δ Save my name and email and send me emails as new comments are made to this post.


![]()
