How to Edit a Header in Excel 2010
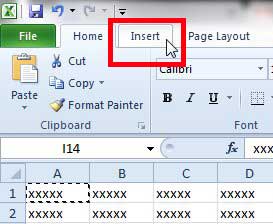
In case you are confused about what the header actually is in Excel, it is the very top of the document. In the normal view, the header is not visible, and it is not editable from the cells in your spreadsheet. It is an entirely separate part of the document that is adjusted in a different location. You can add or change the content of a header by following the steps below. Step 1: Open the Excel spreadsheet containing the header that you want to edit. Step 2: Click the Insert tab at the top of the window.
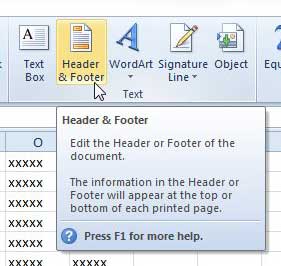
Step 3: Click the Header & Footer icon in the Text section of the ribbon at the top of the window. This is going to change the view of the spreadsheet.
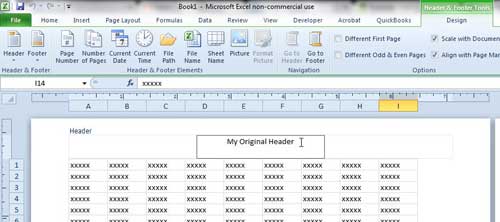
Step 4: You will notice in the image below that you can see the content of the header.
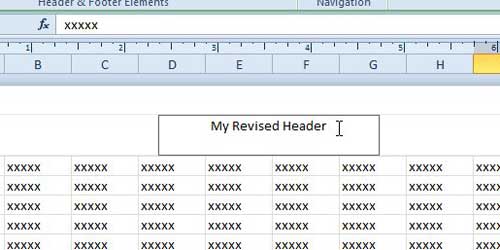
Step 5: Click inside the header, then change the content as needed.
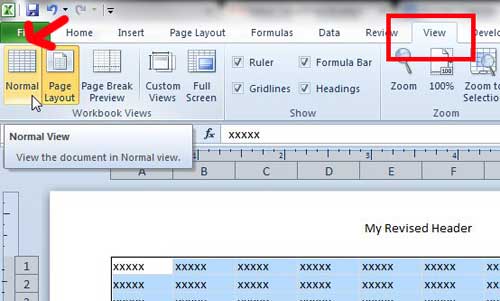
You can return to the regular Excel view by clicking the View tab at the top of the window, then clicking the Normal option in the Workbook Views section of the ribbon.
If these options are grayed out, then just click on any cell in the spreadsheet before clicking the Normal option. Another helpful element of a multiple page spreadsheet are the headers at the top of your columns. But, by default, they only print on the first page. Click here to read about printing your column headers on every page. Have you been thinking about upgrading to Windows 8? Click here to read more about Windows 8 and read reviews from people that have already purchased the upgrade. After receiving his Bachelor’s and Master’s degrees in Computer Science he spent several years working in IT management for small businesses. However, he now works full time writing content online and creating websites. His main writing topics include iPhones, Microsoft Office, Google Apps, Android, and Photoshop, but he has also written about many other tech topics as well. Read his full bio here.
You may opt out at any time. Read our Privacy Policy
