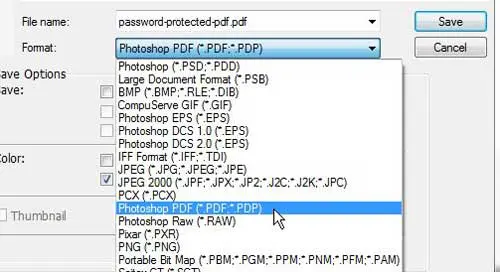
Password Protect a Photoshop PDF Adding passwords to Photoshop PDFs is something that can be done on a per-file basis, so it is not a setting that you will constantly need to be enabling and disabling every time you run Photoshop CS5. So continue reading below to learn how to add a password to an individual PDF file in Photoshop. Step 1: Open the PDF file in Photoshop that you want to protect with a password. Step 2: Click File at the top of the window, then click the Save As option. Step 3: Type a name for the file into the File name field. Step 4: Click the drop-down menu to the right of Format, click the Photoshop PDF option, then click the Save button.
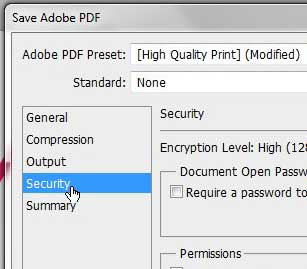
Step 5: Click Security at the left side of the window.
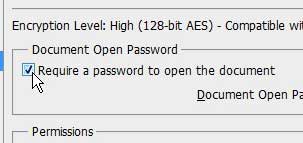
Step 6: Check the box to the left of Require a password to open the document.
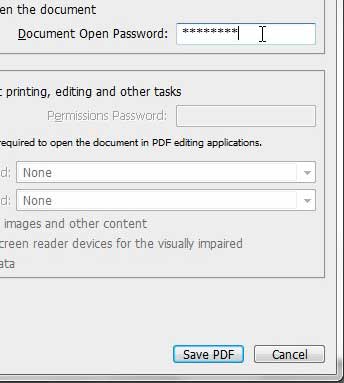
Step 7: Type your password into the field to the right of Document Open Password, then click the Save PDF button at the bottom of the window.
Step 8: Re-type the password into the Confirm password field, then click the OK button. When you go to open the PDF file in the future you will need to enter the password that you created in the steps above. You will also notice that there are some permission options that you can set on the menu where you choose the password. Take a look at those options to see if they might work better for your needs. After receiving his Bachelor’s and Master’s degrees in Computer Science he spent several years working in IT management for small businesses. However, he now works full time writing content online and creating websites. His main writing topics include iPhones, Microsoft Office, Google Apps, Android, and Photoshop, but he has also written about many other tech topics as well. Read his full bio here.
You may opt out at any time. Read our Privacy Policy


